Recently, after successfully busting down my yarn stash, I felt I was due for a reward: more yarn! I cruised my favorite online stores and ordered a few pounds of interesting items. One that caught my eye was a “straw yarn” I found at Made in America Yarns. I love working with unusual cellulose fibers and had to try it, so I ordered two skeins. When they arrived, I realized I now have a lifetime supply – each skein was over a pound! I couldn’t get them on my umbrella swift, so I carefully placed the skein on a table and wound off 14 balls per skein with my ball-winder. This yarn is sproingy and hard to control so I put each ball in a mesh bag to keep it from unwinding itself.


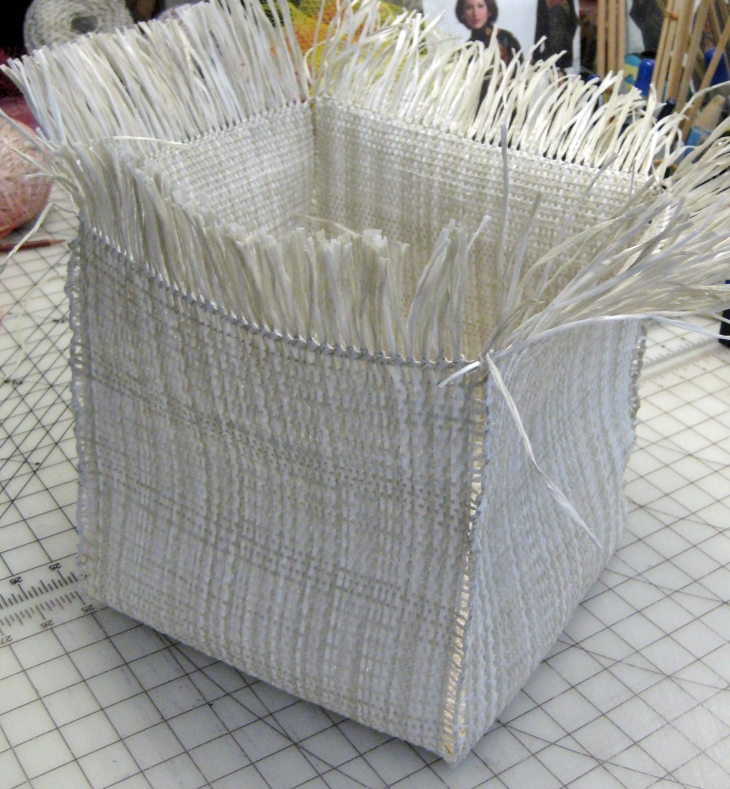
The “straw yarn” is actually paper raffia. Unlike true raffia which comes from a particular kind of palm tree, this is man-made to look and act like raffia, but is much softer and it is still a natural fiber. I did a burn test and got a gray ash with a smell of burning newspaper. It is very strong when pulled along the grain, so I thought it would stand up to weaving in the warp. Now how to get this stuff on the loom: I briefly considered weaving it on a floor loom, but decided threading the heddles and sleying the reed would be asking for punishment, so I tried warping directly onto my rigid heddle loom. Surprisingly, it was not at all difficult! Having no elasticity, the warp has to have a little more slack than I would prefer, but weaving went pretty well. I set the yarn at 12.5 ends per inch and wove a plain weave, which gives a slightly warp-faced textile. I think a 10-dent reed would be ideal, but we weave with what we have.

My plan was to weave a basket in two pieces, each about 9 by 30 inches. I centered them by crossing at right angles and I stitched the two layers together in a square for the bottom of the basket. Then I folded the long sides up and stitched them together, folded the hem-stitched edges down and stitched them in place. The first basket came out rather shorter and wider than I wanted, but it makes a good storage container for the remaining balls of yarn.

The second basket is made of two pieces 8 inches wide. One is about 30 inches long, the other about 32 inches. I made the basket the same way as the first, but left a wider hem on the two longer edges and threaded leather strips through them for handles. My basket is now the size and shape I originally wanted and ready to carry my sneakers, towel, etc. to the gym.